How to Use a Moka Pot: Brew Perfect Coffee Every Time
The Moka Pot: Your Tiny Stovetop Espresso Buddy
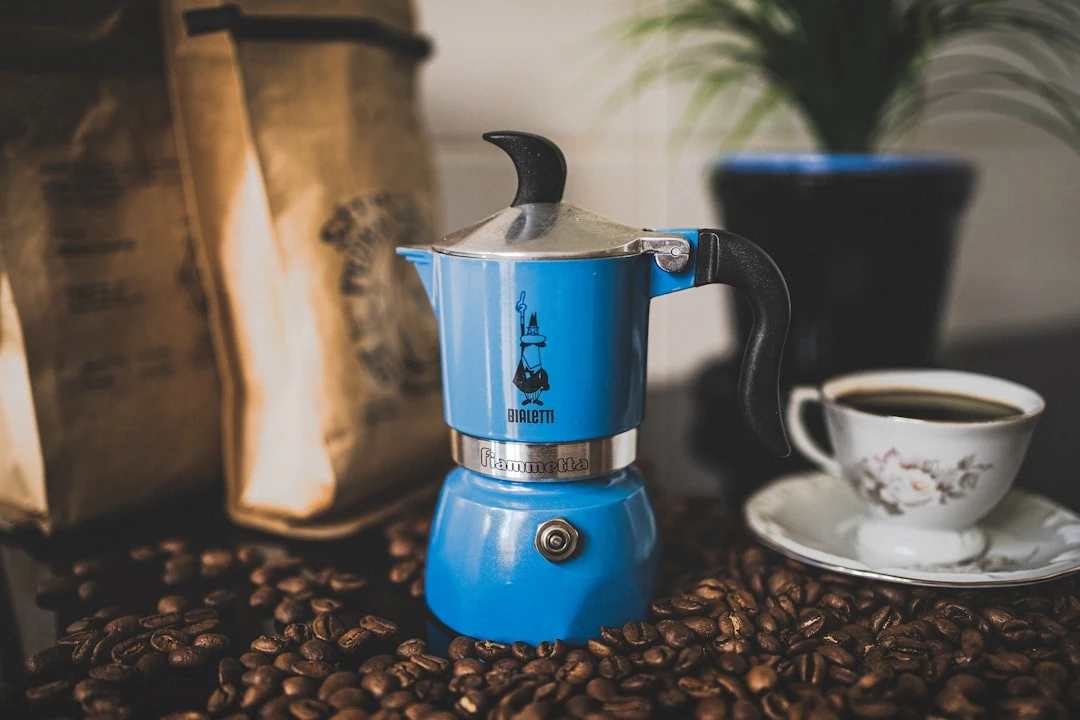
Imagine this — Italy, 1933. Alfonso Bialetti, an engineer with a knack for solving problems, stares at his morning coffee setup and thinks, "There has to be a better way." And just like that, the Moka pot enters the world. Nearly a century later, it’s still doing its thing—brewing strong, espresso-like coffee without fuss. No fancy machines, no outlets—just heat, patience, and a refusal to drink anything less than bold.
How the Magic Works
A Moka pot might look simple, but it’s got a clever little system going on. Three main parts team up to make your coffee happen:
- Bottom Chamber – Fill it with water, set it on heat, and soon enough, steam starts building up.
- Funnel Filter – Pack it with finely ground coffee—not too tight, not too loose. It perches inside like a tiny, caffeinated crown.
- Top Chamber – Where the payoff happens. Pressure forces hot water through the grounds, and presto—your coffee gathers here, dark and ready.
Heat rises, pressure does its thing, and water rushes through the coffee like it’s got somewhere to be. The result? A robust, full-flavored brew that doesn’t mess around.
Why You’ll Love It
- Stronger Than Your Willpower – Not quite espresso, but close enough to fuel your morning (or afternoon, or evening).
- No Plug Required – Stovetop? You’re set. Gas, electric, even induction—just add heat.
- Built to Last – Aluminum or stainless steel means this thing scoffs at dents and dings. Take care of it, and it’ll outlive your last three phones.
It won’t replace a high-end espresso machine, sure. But if you want rich, no-nonsense coffee without the hassle? The Moka pot’s got your back. Simple, reliable, and stubbornly good—just like your caffeine habit.
Next up: How to brew with it properly—without ending up with something that tastes like regret. Stay tuned.
Everything You’ll Need for Moka Pot Coffee (Plus a Few Tips)
Alright, let’s be honest—making coffee with a Moka pot isn’t exactly brain surgery. But having the right stuff? That’s what turns a decent cup into something worth savoring. Here’s the rundown:
- The Moka Pot Itself – Size matters. A 3-cup is ideal for one, but if you’re sharing (or just really need that extra kick), scale up. Just give it a quick once-over—no one wants last week’s crusty leftovers lurking in the cracks.
- Coffee (Obviously) – Aim for a grind that’s somewhere between beach sand and table salt—not espresso-fine, but not pebbly either. No grinder? No big deal. Plenty of places sell pre-ground labeled for Moka pots.
- Grinder (If You’re Feeling Extra) – Fresh beans? Nice touch. A burr grinder’s the gold standard, but let’s be real—we’ve all made do with a janky blade grinder when desperation called.
- Water (But Make It Taste Good) – If your tap water smells like a pool, skip it. Filtered and cool is the way to go. And don’t use hot water—sounds smart, but it’ll throw off the whole brew.
- Heat Source – Gas, electric, whatever. Just keep it medium-low. Crank it up too high, and you’ll end up with bitter regret in a cup.
- Flat Surface (For Electric Stoves) – Uneven pot? Uneven coffee. If your stove’s got a wobble, give it a little shimmy until things sit right.
- Oven Mitt or Dish Towel – That handle turns into a tiny inferno. Burnt fingers? Not the morning vibe you’re after.
- Spoon (Literally Any Spoon) – Just to give the grounds a gentle press. No need for fancy gear—I’ve used a butter knife more times than I’d care to admit.
- Timer (Optional) – Usually 5-7 minutes, but you’ll know it’s done when you hear that signature glug-glug. No need to hover.
And that’s it. You’re all set. Up next: the actual brewing—and how to nail it without any disasters.
How to Use a Moka Pot (Without Burning Your Coffee)
Alright, let’s talk about making that deep, almost-espresso coffee at home. The Moka pot’s perfect for it—if you don’t accidentally turn your kitchen into a disaster zone. Here’s how I do it without ending up with something that tastes like burnt regrets:
1. Water First, But Not Too Much
Start with cold water—ignore the hot water advice, it’s nonsense. Fill the bottom chamber just below that tiny safety valve. For my little 3-cup pot, that’s around 200ml. Go past it, and you’ll either drown your coffee or end up with a puddle on the stove.
2. Coffee Time—Don’t Pack It Down
Grind your beans medium-fine, like damp sand. Pile it into the filter until it’s mounded, then lightly brush your finger to level it. No pressing. Seriously, this isn’t a workout—just let it breathe.
3. Assemble Like You Mean It
Slot the filter into the base, then screw the top on tight. Think "last pickle jar you’ll ever open" tight. Peek at the rim for stray grounds—those little hitchhikers love ruining the seal.
4. Heat It Right, Not Fight It
Medium-low flame. Slow and steady. Crank it up too high, and you’ll scorch the coffee into something that tastes like punishment. (Yeah, I’ve been there.)
5. Listen for the Magic
The water’ll start bubbling up through the coffee, filling the top chamber. When you hear that glug-glug-hiss? Almost there.
6. Act Fast—Don’t Let It Spit
The second the top’s full, move fast—get it off the heat. Now. If it starts sounding like a steamed-off teakettle, you’ve crossed the line. Plunge the base into cold water to shock it into stopping. Pour, sip, tweak next time if you need to.
Might take a couple tries to get it just right, but once you do? Pure magic. Skip the café line—you’ve got this.
How to Brew the Perfect Moka Pot Coffee
Let’s be honest—getting Moka pot coffee just right can feel like a shot in the dark at first. But once you figure it out? Pure alchemy. Here’s how to make yours sing.
- Fresh beans, ground just right – Start with good beans, then grind them medium-fine—think somewhere between sand and sugar. Too fine? Clogs. Too coarse? Thin disappointment.
- Hot water’s your friend – Don’t bother with cold. Fill the base with hot (not boiling) water. Faster brew, smoother taste.
- Don’t pack that basket – Spoon in the grounds, give it a gentle tap to even things out, but never press. Too tight and it chokes. Too loose? Weak and underwhelming.
- Low and slow wins the race – Medium-low heat is key. Too high? Scorched. Too low? Nothing. And when it starts hissing like a tiny dragon—pull it off the heat, fast.
- Shock it to stop it – Dunk the base in cold water to cut the brew. Otherwise, it’ll over-extract and turn bitter (yep, learned that one the messy way).
- Clean it, but keep it simple – Rinse everything well—skip the soap. That residue? It ghosts into your next cup.
Follow these steps, and you’ll get rich, velvety coffee every time. Adjust the grind or heat to suit your taste, and suddenly—you’ve got the magic touch.
Common Moka Pot Blunders (And How to Fix ’Em)
Alright, moka pots look easy—until your brew tastes like a tire fire or you’re mopping coffee off the ceiling. We’ve all been there. Here’s where things usually go sideways, and how to steer clear:
1. That Water Chamber Is Not a Suggestion
Pour past the safety valve? Now you’ve got lukewarm coffee and a stovetop mess. Stick just below that tiny metal bump—200ml tops for a 3-cupper. No exceptions.
2. Stop Treating It Like Espresso
If you’re tamping the grounds like you’re paving a driveway, stop. Just scoop, brush off the excess, and leave it be. No pressing. Your coffee will taste like coffee, not bitterness.
3. Heat Control Is Everything
Blast it on high and you’ll char the beans; too low and it’s just sad, tepid water. Medium-low heat is the move. And when it starts hissing like a pissed-off cat? Yank it off the burner. Fast.
4. Clean It. Seriously.
Skip the wash, and your pot becomes a shrine to old coffee sludge. Rinse it after every use (keep that gasket dry). Once a month, give it a vinegar soak—think of it as a detox for your brewer.
5. Grind Matters More Than You Think
Too fine? You’ll clog it. Too coarse? Tastes like dishwater. Shoot for somewhere in the middle—not quite espresso, not quite drip. Your mouth will thank you.
6. Don’t Just Let It Sit There
Walk away, and you’ll come back to bitter swill. Pour it the second it’s done, then shock the base with cold water to stop the brew. Coffee waits for no one.
Get these right, and you’re set—deep, smooth coffee without the hassle. (And way fewer kitchen disasters.)
How to Keep Your Moka Pot Happy (and Your Coffee Tasting Amazing)
Let’s face it—your Moka pot has a bit of a diva streak. It demands attention, but give it what it needs, and it’ll pour out rich, soul-warming coffee for ages. Here’s how to keep it humming along.
Right After Brewing (Seriously, Don’t Skip This)
First, break it all down—every last piece. The base, the funnel, the filter, the top chamber. A quick rinse with warm water (skip the soap; your taste buds will notice) is all it takes. A soft brush or cloth helps nudge out stubborn grounds without leaving scratches. And whatever you do, let it dry completely before putting it back together. A damp Moka pot is a sad Moka pot.
When It Needs a Deep Clean
After a while, coffee oils and mineral buildup start throwing a rager inside your pot. Shut it down. Mix water and white vinegar, half and half, then run it through like a normal brew—just, you know, without the coffee. Rinse it really well afterward unless you’re into that tangy vinegar espresso vibe. For stubborn stains? A little baking soda paste and a soft touch will do the trick.
Little Things That Make a Big Difference
- Hand Wash Only: Dishwashers? Nope. They’ll warp the metal and wreck the seals faster than you can say “weak coffee.”
- Replace the Worn Parts: That rubber gasket and filter? They don’t last forever. Swap them every 6–12 months (or sooner if they look rough). Good pressure depends on it.
- Store It Smart: Don’t leave it sitting assembled. Take it apart, let it breathe, and keep it somewhere dry. Otherwise, you’re inviting mustiness—or worse.
Stick to this, and your Moka pot will stick by you. Here’s to many more cups of the good stuff.
Moka Pot FAQ – The No-Nonsense Guide
1. So, how does this thing actually work?
Fill the bottom chamber with water, screw on the middle section packed with coffee grounds, and heat it up. Steam builds pressure, forcing hot water up through the grounds—until suddenly, your coffee appears in the top chamber like some kind of caffeinated alchemy. Simple, but brilliant.
2. What grind should I use?
Think of sea salt, not flour. Not too fine, not too coarse. Get it wrong, and you'll either choke the water flow or end up with a sad, weak brew.
3. Do I press the coffee down like an espresso?
Please don't. Just smooth it out gently with your finger. Packing it down turns your moka pot into a tiny, rebellious dam.
4. Why does my coffee taste like regret?
Overcooked. Maybe the grind's too fine, maybe you packed it too tight, or maybe you left it on the heat too long. As soon as the top chamber's full, take it off. No dawdling.
5. Will this work on my fancy induction stove?
Only if it's built for induction. Standard aluminum pots? Forget it. You'll need an adapter—or just use a different burner.
6. How do I keep this thing clean?
Rinse it with warm water after each use—skip the soap, unless you want your next brew tasting like dishwater. Every so often, a vinegar soak helps dissolve the stubborn buildup.
7. How long until this thing croaks?
Decades, if you take care of it. Just swap out the rubber seal and filter when they start looking rough.
Got it? Good. Now go make something delicious.
Related Articles

Espresso vs Americano: What’s the Difference and Which Should You Choose?
Read More →
How to Make Perfect Decaf Cold Brew at Home
Read More →