How to Make Nitro Cold Brew at Home: The Complete Guide to Creamy, Smooth Coffee Perfection
Did you know that nitro cold brew sales have skyrocketed by over 400% in coffee shops nationwide over the past five years? Yeah, I was pretty shocked by that number too! But honestly, once you've had that first sip of perfectly smooth, cascading nitro cold brew, it makes total sense.
I'll never forget my first encounter with nitro cold brew. I was rushing through the airport, desperately needing caffeine, when I spotted this fancy coffee cart with what looked like beer taps. The barista handed me this gorgeous glass with coffee that looked like it was dancing – literally cascading and swirling like some kind of coffee magic trick. One sip and I was absolutely hooked.
The thing is, that $6 airport coffee became a daily habit pretty quickly, and my wallet started crying! So I did what any reasonable coffee addict would do – I figured out how to make nitro cold brew at home. And let me tell you, after plenty of trial and error (and a few kitchen disasters), I've cracked the code.
In this guide, I'm gonna walk you through everything you need to know about making cafe-quality nitro cold brew in your own kitchen. We'll cover the equipment you actually need, the step-by-step process, and all those little tricks I wish someone had told me when I started. Trust me, by the end of this, you'll be pouring perfect nitro cold brew like a pro!
What Is Nitro Cold Brew Coffee? (Understanding the Basics)
Okay, so before we dive into the how-to stuff, let's talk about what nitro cold brew actually is. Because honestly, I had no clue when I first started this journey, and I made some pretty embarrassing assumptions.
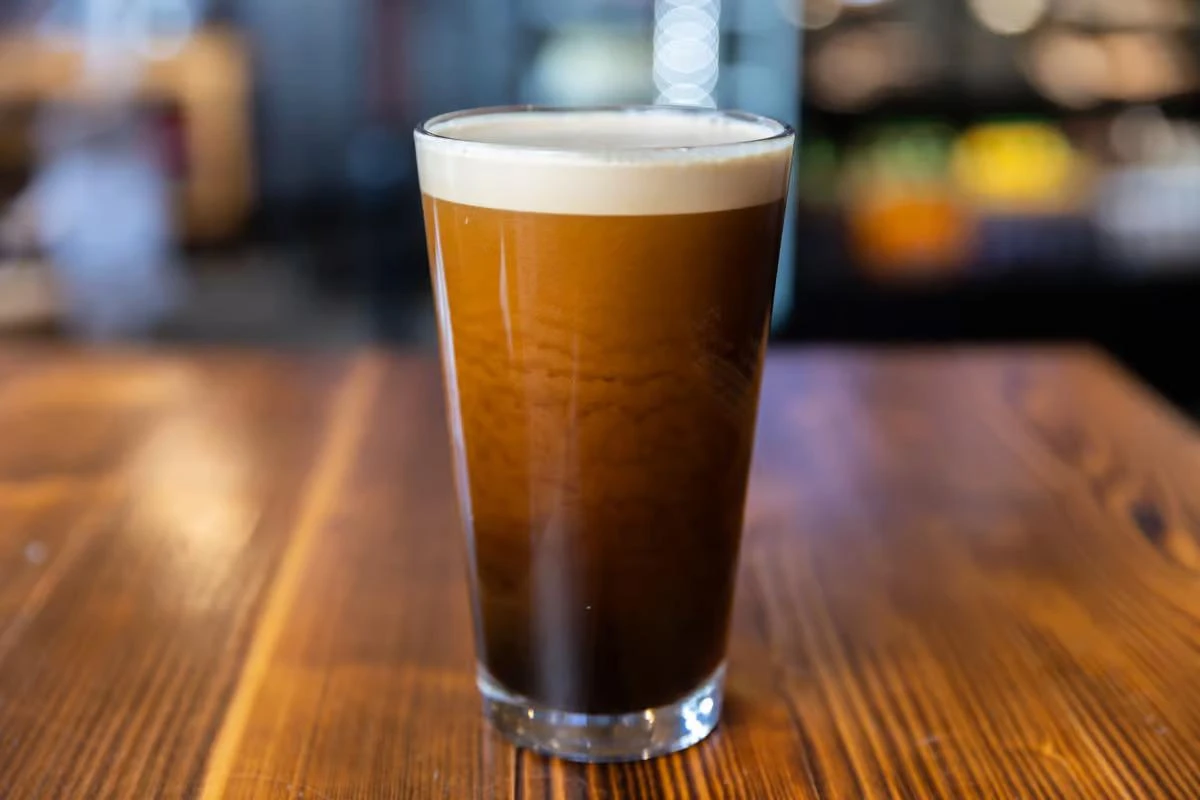
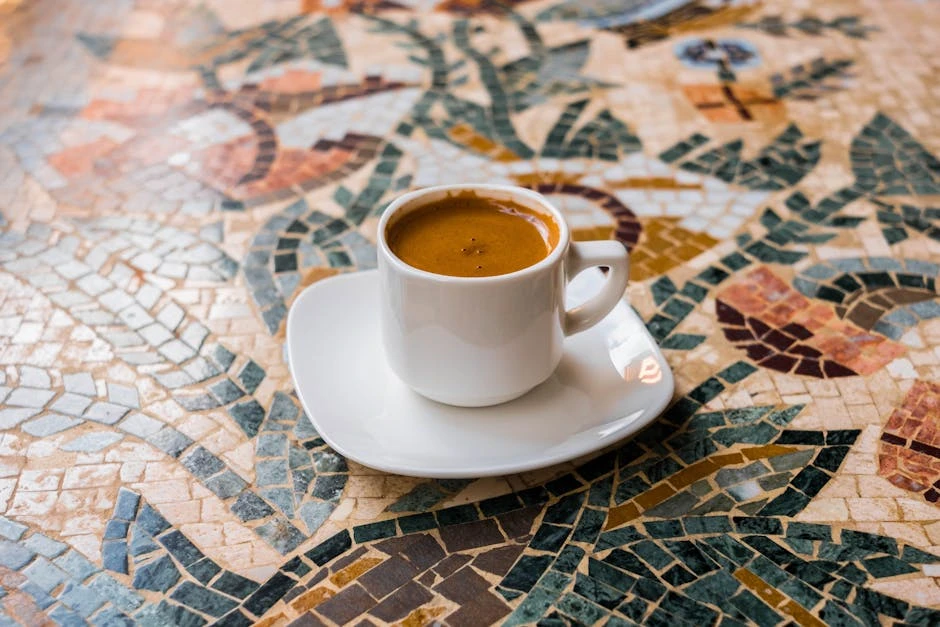
Nitro cold brew is basically regular cold brew coffee that's been infused with nitrogen gas. Sounds fancy, right? The nitrogen is what creates that signature creamy, almost Guinness-like texture and that mesmerizing cascade effect when you pour it. It's like regular cold brew's cooler, more sophisticated cousin.
Here's where I got confused initially – I thought nitro cold brew was just cold brew served really cold. Nope! The magic is all in that nitrogen infusion. When you infuse cold brew with nitrogen under pressure, it creates tiny bubbles that give the coffee this incredible velvety mouthfeel. It's smoother than regular cold brew and way less acidic too.
The difference between regular cold brew and nitro cold brew is huge. Regular cold brew is great, don't get me wrong, but it can sometimes taste a bit flat or one-dimensional. Nitro cold brew? It's got this rich, creamy texture that makes every sip feel indulgent. Plus, the nitrogen actually enhances the coffee's natural sweetness, so you might find yourself skipping the sugar altogether.
I remember trying to explain this to my neighbor once, and I described it as "coffee that thinks it's a milkshake." She looked at me like I'd lost my mind, but after I made her a cup, she totally got it. Now she comes over every morning for her nitro fix – oops!
Most coffee shops use fancy commercial nitro systems that cost thousands of dollars, but the good news is you can achieve similar results at home with much simpler equipment. The principle is the same: cold brew coffee + nitrogen gas + pressure = coffee heaven.
Essential Equipment for Making Nitro Cold Brew at Home
Alright, let's talk gear. This is where I made my first big mistake – I went overboard thinking I needed all the fancy commercial equipment. Spoiler alert: you don't!
For a basic nitro setup, you really only need a few key pieces of equipment. First up is a nitro cold brew maker or dispenser. I started with the NitroBrew system, which runs about $200, and it's been rock solid. It's basically a growler with a tap that uses nitrogen cartridges to infuse your cold brew. Simple but effective.
Speaking of nitrogen cartridges, you'll need those too. I buy mine in bulk from kitchen supply stores or online – they're the same ones used for whipped cream dispensers. Pro tip: don't do what I did and run out of cartridges on a Sunday morning when nothing's open. Stock up!
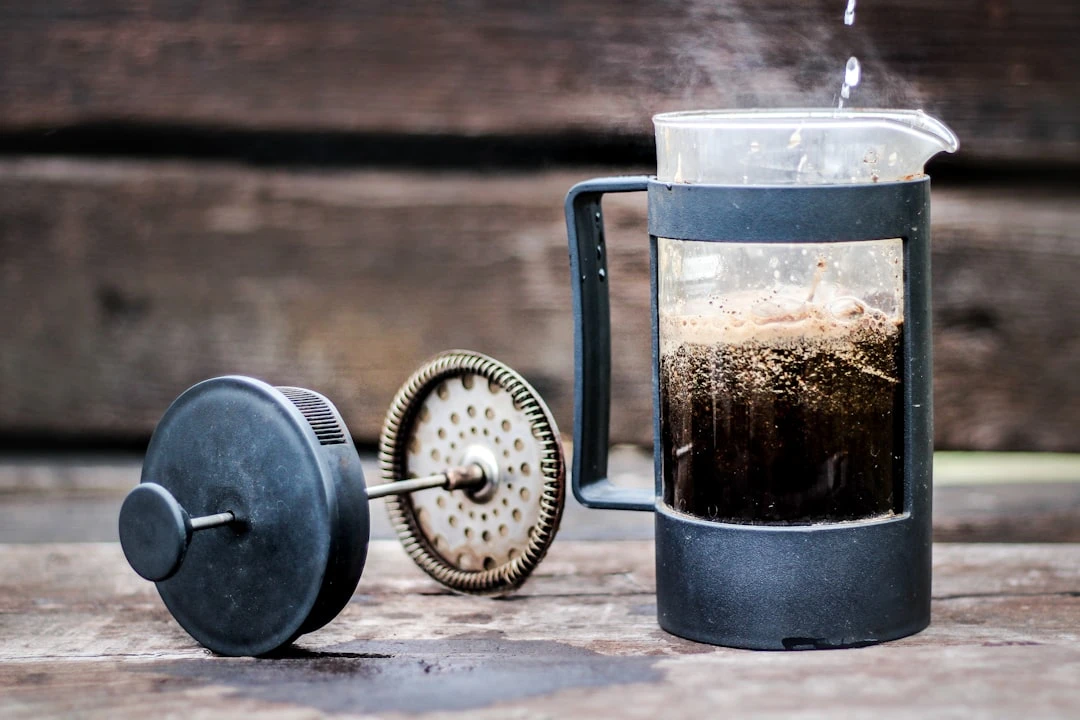
Now, for brewing the cold brew base, you don't need anything fancy. I use a large mason jar and a fine-mesh strainer, though some folks prefer cold brew makers with built-in filters. My setup cost maybe $15 total, and it works perfectly fine.
If you're on a tight budget, there are some DIY alternatives. I've seen people use whipped cream dispensers to make nitro cold brew, though the results can be hit or miss. The texture isn't quite as perfect, but hey, it's better than paying $5 per cup at the coffee shop!
For those ready to go all-in, there are premium systems like the Royal Brew Nitro that'll set you back around $400-500. Honestly? Unless you're making nitro cold brew for a small army every day, the mid-range options work just fine. I learned this the hard way after almost buying a $800 system that would've been total overkill for my needs.
One thing I didn't consider initially was storage. You'll need space in your fridge for both your cold brew concentrate and your nitro dispenser. My tiny apartment fridge was not prepared for this coffee obsession! Make sure you've got the real estate before you commit.
The beauty of most home nitro systems is that they're pretty foolproof once you get the hang of them. No complicated maintenance, no special training required – just good cold brew, nitrogen cartridges, and a little patience while you perfect your technique.
Step-by-Step Guide: How to Make Cold Brew Base
Here's where the magic starts – making that perfect cold brew base. I've tried probably a dozen different methods over the years, and I've finally settled on what I think is the ultimate approach.
First things first: coffee selection matters way more than I initially thought. I learned this lesson the expensive way after ruining several batches with the wrong beans. For nitro cold brew, you want a medium to dark roast with low acidity. I've had great success with Colombian and Brazilian beans. My current go-to is a medium-dark Colombian roast from my local roaster.
The grind size is crucial – and this is where I screwed up big time in my early days. You want a coarse grind, similar to what you'd use for French press. Too fine, and your cold brew will be over-extracted and bitter. Too coarse, and it'll be weak and disappointing. I invested in a decent burr grinder after my cheap blade grinder gave me inconsistent results that drove me crazy.
My ratio is 1:4 coffee to water for concentrate – that's about 1 cup of ground coffee to 4 cups of cold, filtered water. Some people go 1:5, but I like my concentrate strong since you're diluting it anyway when you serve it. Trust me on this one – start strong, you can always add water later.
The brewing process is pretty straightforward. I combine the coffee and water in a large mason jar, give it a good stir, and then let it sit at room temperature for about 2 hours before moving it to the fridge. Then it's a waiting game – 12 to 24 hours for full extraction. I usually aim for 18 hours because that seems to hit the sweet spot.
Straining is where patience pays off. I use a fine-mesh strainer lined with cheesecloth or a coffee filter. Yeah, it takes forever, but rushing this step ruins everything. I learned this after trying to speed things up with a regular strainer and ending up with gritty coffee that was basically undrinkable.
One mistake I made early on was not making enough concentrate at once. This stuff keeps in the fridge for up to two weeks, so I now make big batches. It's way more efficient than making tiny amounts every few days. Plus, there's nothing worse than running out of cold brew concentrate when you're craving nitro!
Storage is key too. I keep my concentrate in airtight glass containers in the fridge. Plastic containers can absorb odors and affect the taste. Glass mason jars work perfectly and they're cheap.
The Nitro Infusion Process: Adding the Magic
Okay, this is the fun part – turning your regular cold brew into that silky, cascading masterpiece! But let me tell you, I definitely had some learning curves here.
First up: safety. Those nitrogen cartridges are under pressure, so don't be an idiot like I was initially. Read the instructions, handle them properly, and never try to puncture a used cartridge. I learned this lesson after nearly launching a cartridge across my kitchen – scared the hell out of me and my cat!
Loading your nitro system is pretty straightforward once you get the hang of it. I fill my dispenser about 2/3 full with cold brew concentrate (not full strength – I usually dilute it 1:1 with cold water first). Leave some headspace for the nitrogen to do its thing.
Installing the nitrogen cartridge varies by system, but most are pretty intuitive. You screw it in until you hear the gas release – that little "pssh" sound means you're good to go. Don't over-tighten! I stripped the threads on my first dispenser doing exactly that.
Now here's where technique matters. When you're ready to pour, hold your glass at a 45-degree angle and pour steadily but not too fast. You want that beautiful cascade effect, not a foamy mess. It took me probably 20 attempts to get this right, and I wasted a lot of perfectly good cold brew in the process.
The temperature is crucial too. Your cold brew should be properly chilled – around 38-40°F works best. Room temperature cold brew doesn't create the same effect, and warm cold brew with nitrogen is just... wrong. Don't ask me how I know this.
One thing that frustrated me early on was inconsistent results. Sometimes the nitro would be perfect, other times it would be flat or over-carbonated. Turns out, the age of your cold brew concentrate matters. Fresh concentrate (within 3-4 days) gives the best nitro results. Older concentrate still tastes fine, but the nitrogen infusion isn't as dramatic.
If you're not getting enough cascade or creaminess, try chilling your dispenser in the fridge for 30 minutes before serving. Cold equipment helps the nitrogen stay dissolved longer, giving you better texture and that Instagram-worthy pour.
Pro Tips for Perfect Nitro Cold Brew Every Time
After making literally hundreds of cups of nitro cold brew (yeah, I might have a problem), I've picked up some tricks that make a huge difference.
Water quality is something I completely overlooked initially, and it bit me in the ass. Using tap water with high mineral content or chlorine can seriously mess with your cold brew's flavor. I started using filtered water, and the difference was night and day. If your tap water tastes off, your cold brew will too – it's that simple.
Bean freshness matters more than I thought it would. I used to buy coffee in bulk to save money, but stale beans make flat, lifeless cold brew. Now I buy smaller amounts more frequently, ideally beans roasted within 2-3 weeks. Yeah, it costs a bit more, but the flavor improvement is totally worth it.
Here's a weird tip that actually works: the optimal serving temperature for nitro cold brew is around 42-45°F. Too cold and you lose some of the flavor complexity, too warm and the nitrogen doesn't work properly. I keep a thermometer in my fridge just to check this now – told you I might have a problem!
Glassware makes a difference too. Those tall, narrow glasses you see at coffee shops aren't just for show. The shape helps maintain the nitrogen bubbles and showcases that beautiful cascade. I invested in some proper nitro glasses, and honestly, it makes the whole experience feel more special.
For flavor customization, less is more. The nitrogen naturally enhances the coffee's sweetness, so you might not need any additives. But if you want to jazz things up, add syrups or milk to your glass before pouring the nitro – don't mix them into the dispenser. I learned this after ruining a whole batch with vanilla syrup that didn't play nice with the nitrogen.
Timing your nitrogen cartridge replacement is key. Most cartridges are good for about 8-10 servings, but the last few pours won't have as much nitrogen content. I keep track in a little notebook because consistency matters when you're trying to perfect your technique.
One mistake I see people make is shaking the dispenser before pouring. Don't do this! It messes with the nitrogen distribution and can create uneven texture. Just gently turn the dispenser upside down once or twice if you need to mix things up.
Troubleshooting Your Nitro Cold Brew Setup
Let me save you some of the headaches I went through by sharing the most common problems and their fixes.
Flat or under-nitrogenated coffee is probably the most frustrating issue. This usually happens when your cold brew is too old, your cartridge is running low, or your dispenser isn't cold enough. The fix? Use fresh cold brew (no more than a week old), replace your cartridge, and chill everything properly. I spent weeks wondering why my nitro was inconsistent before I figured out these variables.
If your nitro tastes bitter or weak, you've probably got an extraction issue with your cold brew base. Over-extraction happens when you grind too fine or brew too long. Under-extraction is the opposite – grind too coarse or brew time too short. I keep detailed notes now about what works because coffee memory is apparently not a thing I possess.
Equipment maintenance is something I totally neglected at first, and it caused problems. Clean your dispenser thoroughly between uses, especially the tap mechanism. Old coffee oils build up and create off-flavors. I use a mixture of warm water and baking soda, followed by a thorough rinse. Every few weeks, I do a deeper clean with specialized coffee equipment cleaner.
Cartridge issues are usually user error – I know because I've made every mistake possible. If your cartridge isn't dispensing properly, check that it's seated correctly and that you haven't over-tightened it. If it's leaking, you might have a worn seal or a damaged cartridge. Don't try to fix it yourself – just replace the part.
Sometimes the cascade effect just doesn't happen, even when everything else seems right. This usually means your cold brew concentrate is too diluted or your nitrogen pressure is too low. I keep different dilution ratios ready to test when this happens. Usually, a slightly stronger concentrate fixes the problem.
If you're getting too much foam and not enough liquid, you're probably pouring too aggressively or your cold brew is too warm. Slow down your pour and make sure everything is properly chilled. Patience is key here – rushing the pour ruins the whole experience.
One weird issue I encountered was metallic taste in my nitro. Turns out, I wasn't rinsing my dispenser thoroughly after cleaning, and the cleaning solution was affecting the flavor. Now I rinse like crazy and always do a test pour with just water before adding cold brew.
Conclusion
Making nitro cold brew at home has honestly changed my entire coffee game. What started as a way to save money on expensive coffee shop drinks turned into this awesome hobby that brings me genuine joy every morning.
The process might seem complicated at first, but once you get the basics down, it becomes second nature. Start with good quality coffee beans, nail your cold brew technique, invest in decent equipment, and be patient with yourself while you figure out all the little details. Everyone's taste preferences are different, so don't be afraid to experiment with ratios, brewing times, and serving styles until you find your perfect cup.
Remember, safety first with those nitrogen cartridges, and don't skip the equipment maintenance – trust me on this one! Your future self will thank you when everything keeps working smoothly.
The best part about making nitro cold brew at home is the flexibility. Want it stronger? Adjust your ratio. Prefer it sweeter? Add a touch of simple syrup. Want to impress friends? Perfect your cascade pour technique. It's all about finding what works for you and your taste buds.
Related Articles
Espresso vs Americano: What’s the Difference and Which Should You Choose?
Read More →
How to Make Perfect Decaf Cold Brew at Home
Read More →