How to Make Cappuccino at Home: Your Complete Guide to Café-Quality Results
Did you know that Italians consume over 14 billion espresso-based drinks annually, with cappuccino being their sacred morning ritual? I'll never forget the first time I nailed a perfect cappuccino in my own kitchen – the silky microfoam, the rich espresso foundation, and that moment when I realized I'd finally cracked the code that had eluded me for months of frustrating attempts.
Learning to make exceptional cappuccino at home has completely transformed my relationship with coffee. What started as a quest to save money on daily café visits became an obsession with perfecting every element of this deceptively simple drink. Through countless early mornings of experimentation, equipment upgrades, and yes, plenty of disappointing cups, I've discovered that anyone can master café-quality cappuccino with the right knowledge and persistence.
I'm excited to share everything I've learned through years of trial and error, from the science behind perfect milk foam to the timing tricks that make all the difference!
Understanding Cappuccino: The Italian Foundation
My cappuccino journey began with a humbling realization: I had no idea what authentic cappuccino actually was. True cappuccino follows the sacred 1:1:1 ratio – equal parts espresso, steamed milk, and milk foam. This isn't arbitrary; it's the result of centuries of Italian refinement where each component plays a crucial role.
The cultural significance runs deeper than ratios. Cappuccino is traditionally enjoyed only in the morning in Italy – never after 11 AM. This timing isn't just tradition; it's about digestion and natural caffeine rhythm. Understanding this helped me appreciate why my afternoon experiments never felt quite right!
What fascinated me most was learning that technique matters far more than expensive equipment. I've made exceptional cappuccinos with a $200 machine and terrible ones with equipment worth thousands. The difference lies in understanding extraction principles, milk science, and timing – skills you develop through practice, not purchases.
The biggest misconception I overcame was thinking cappuccino was just a smaller latte with more foam. A proper cappuccino has much stronger coffee flavor because the espresso-to-milk ratio is higher, and the foam should be microfoam – creamy and integrated – not stiff, bubbly foam.
Essential Equipment for Home Success
After burning through several setups and making expensive mistakes, I've learned what equipment actually matters for home cappuccino success.
For espresso machines, I started with a $150 steam-driven model that taught basics but frustrated me with inconsistent results. The breakthrough came with a thermoblock machine with proper pump – suddenly I could control pressure and temperature. My sweet spot became a mid-range dual boiler around $800, though I know baristas producing excellent cappuccinos with single boiler machines half that price.
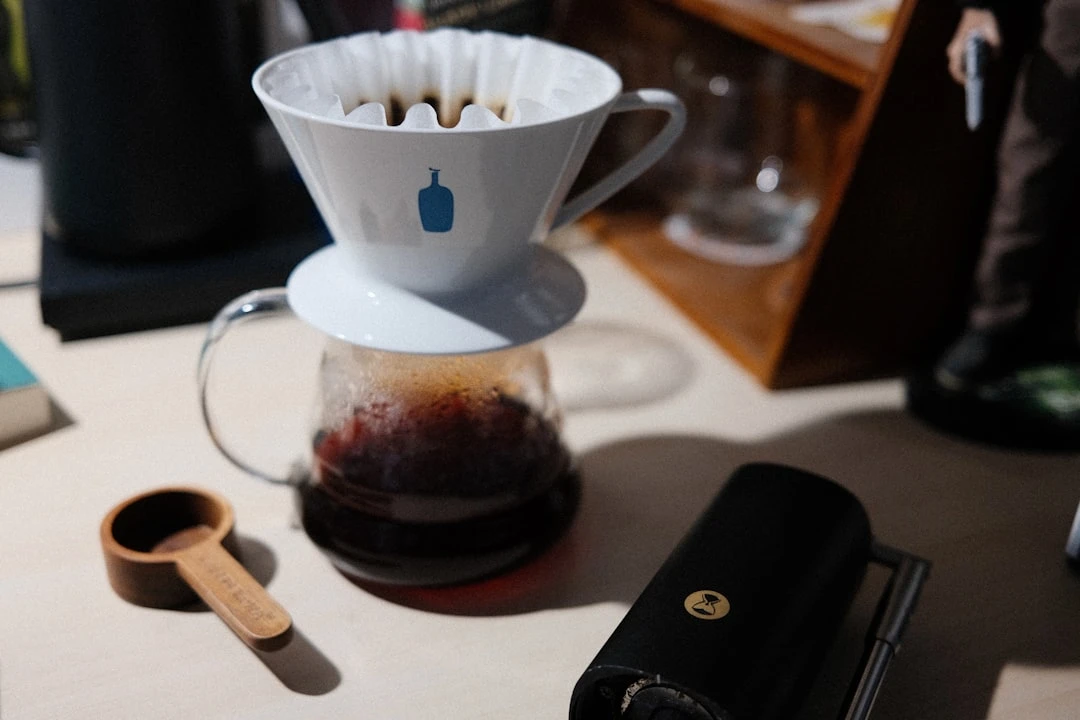
If espresso machines aren't in your budget, don't give up! I spent months perfecting cappuccino-style drinks using a Moka pot for the coffee base. While not technically espresso, strong Moka pot brew combined with properly frothed milk creates something delicious and cappuccino-adjacent.
The milk frothing component initially gave me more trouble than espresso itself. Steam wands are ideal, but the learning curve is steep. My breakthrough actually came from using a French press as backup – pour heated milk in, pump vigorously for 30-60 seconds, and you get surprisingly good microfoam.
Here's what I wish someone told me earlier: your grinder matters more than your espresso machine for shot quality. I struggled with mediocre extractions for months before investing in a proper burr grinder. The difference was immediate and dramatic – consistent particle size means even extraction and balanced, delicious espresso.
Selecting Perfect Coffee Beans
Nothing taught me more about coffee than testing dozens of different beans specifically for cappuccino. What tastes amazing as pour-over might completely disappear under milk, while harsh black coffee can create incredible harmony in milk drinks.
Through extensive testing, I've found medium to medium-dark roasts work best. They provide enough body and richness to complement milk without being overpowered. My go-to beans have chocolate, caramel, or nutty tasting notes – these flavors naturally harmonize with milk's sweetness.
The grinding revelation completely changed my cappuccino game. I used to grind beans weekly and store them, wondering why shots became increasingly sour and flat. Fresh grinding – ideally within minutes of brewing – preserves CO2 that creates crema and maintains volatile flavor compounds. Now I never grind more than I'll use that day.
Grind size adjustments became my daily ritual. Humidity, bean age, and atmospheric pressure affect extraction, so I make micro-adjustments based on shot timing and taste. Too coarse and shots run fast and taste sour; too fine and it chokes the machine while creating bitter over-extraction.
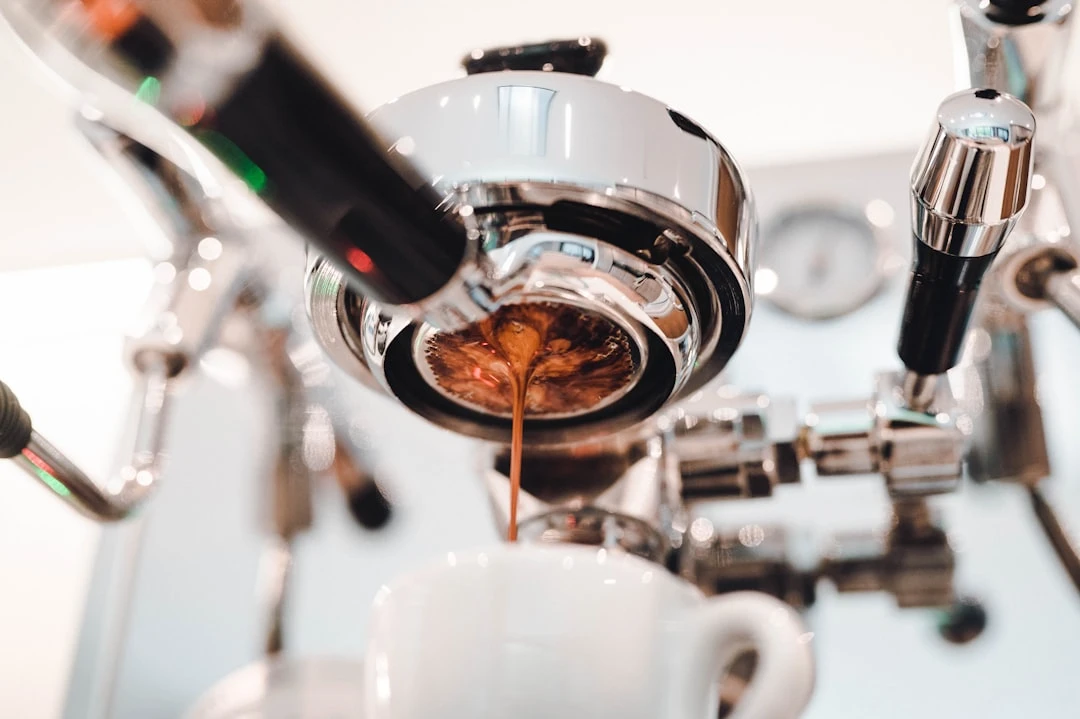
Mastering Espresso Extraction
Espresso extraction became my obsession once I realized it's the foundation that makes or breaks any cappuccino. The magic happens when 200°F water passes through finely ground coffee at 9 bars of pressure for 25-30 seconds. Under-extracted shots taste sour and weak; over-extracted shots become bitter and harsh.
Temperature control was my first major breakthrough. Many home machines run too hot, explaining why early shots tasted burned despite quality beans. I learned to flush the group head before pulling shots, ensuring consistent water temperature.
Tamping technique took forever to master but is absolutely critical. Too light and water channels through the coffee bed; too hard creates a barrier leading to over-extraction. I practiced until 30 pounds of pressure became muscle memory, focusing on keeping the tamp level and consistent.
Timing coordination initially stressed me because espresso quality degrades quickly after extraction. I learned to start steaming milk immediately after starting the espresso shot, timing everything so both components finish simultaneously. This choreography becomes second nature with practice!
The Science of Milk Steaming
Milk steaming frustrated me more than espresso initially because it seemed simple yet consistently produced disappointing results. Understanding the science behind microfoam creation was my breakthrough.
Milk selection dramatically affects results. Whole milk creates the richest, most stable foam due to fat content providing structure and mouthfeel. The proteins actually create foam when heated and agitated, while fats add stability and flavor. Oat milk became my favorite non-dairy option because barista blends are specifically formulated with added proteins.
Temperature control revolutionized my steaming once I stopped eyeballing and started using a thermometer. The sweet spot is 150-160°F – hot enough to denature proteins for stable foam, but not so hot it scalds and creates bitter flavors. I stop steaming at 140°F because milk continues heating after steam stops.
The steam wand technique took months to master. The initial stretching phase incorporates air to create foam volume, while the heating phase develops texture and temperature. I learned to position the wand just below the milk surface initially, creating that paper-tearing sound as air incorporates, then plunging deeper to heat and develop a microfoam texture.
The texture revelation came when I understood the difference between foam and microfoam. Microfoam integrates tiny air bubbles throughout heated milk, creating a paint-like consistency that pours smoothly and tastes creamy rather than bubbly.
Assembly and Presentation
The final assembly initially stressed me because everything happens quickly with no going back. Learning to coordinate timing while maintaining quality required developing a natural rhythm rather than frantic rushing.
Cup preparation makes a bigger difference than I initially realized. Warming cups prevent thermal shock that can break crema and help maintain serving temperature. I use my machine's cup warming tray, but rinsing cups with hot water works well too.
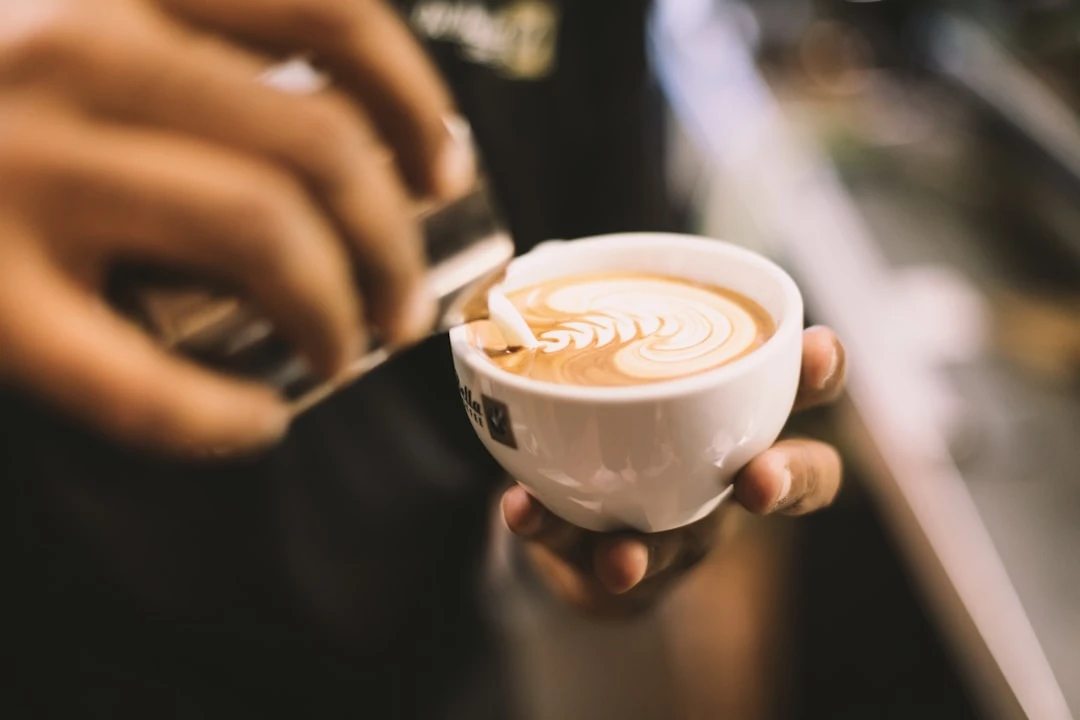
The pouring technique transformed my cappuccinos from layered drinks to integrated masterpieces. I start pouring from higher up, allowing steamed milk to penetrate the crema and mix with the espresso below. As the cup fills, bringing the pitcher closer allows foam to float on top while maintaining integration throughout.
Proper cappuccino cups are smaller than latte cups – typically 5-6 ounces – which concentrates flavors and maintains proper ratios. The thick ceramic helps insulate while the rounded shape enhances aromatics.
Troubleshooting Common Problems
Every cappuccino maker faces frustrating problems, and I've encountered them all. Learning to diagnose and fix issues systematically saved countless disappointing cups and expensive bean waste.
Bitter espresso was my most persistent early problem. Over-extraction from grinding too fine, water that's too hot, or over-dosing creates harsh flavors that overpower milk. I learned to taste shots black before adding milk to identify extraction issues.
Sour espresso presented opposite challenges. Under-extraction from coarse grinding, insufficient brew time, or cool water creates weak, acidic shots. Systematic adjustments – going finer, increasing dose, checking water temperature – usually resolve these issues.
Flat milk foam plagued me until I understood common causes. Cold milk doesn't foam properly because proteins need heat activation. Steam wands without enough pressure can't incorporate air effectively, while old milk won't foam due to protein breakdown.
Temperature problems frustrated me until I invested in a thermometer. Milk that's too hot tastes scalded and bitter while breaking down foam structure. Proper milk temperature requires practice to judge by sound, but thermometers eliminate guesswork during learning.
Conclusion
Mastering home cappuccino has been one of my most rewarding culinary journeys. What started as skipping coffee shops evolved into a daily ritual bringing genuine joy to my mornings. The transformation from frustrated beginner to confident home barista feels like a genuine accomplishment worth celebrating.
Remember that quality ingredients and proper technique matter far more than expensive equipment. I've made exceptional cappuccinos with modest setups and disappointing ones with professional machines. The difference lies in understanding extraction principles and practicing consistently.
Practice truly makes perfect in cappuccino making. Every shot teaches you about grind size, timing, or technique. Even failed attempts provide valuable feedback – embrace mistakes as education rather than frustration.
I encourage you to experiment with different beans, ratios, and techniques to discover your preferences. The traditional Italian approach provides an excellent foundation, but adapting methods to your taste and equipment creates more satisfying results.
Related Articles

Easy Espresso Tonic Recipe: Make This Trendy Iced Coffee Drink in 5 Minutes
Read More →
Espresso Lungo: The Perfect Balance Between Espresso and Coffee
Read More →