How to Make Cold Brew Coffee at Home: Easy Step-by-Step Guide
Introduction to Cold Brew Coffee
Cold brew is smoother, sweeter, and doesn’t have that sharp bite. Instead of rushing things with hot water, you let the coffee grounds steep in cold or room-temperature water for half a day—sometimes even a full day. Without the heat, the bitterness fades away, leaving behind this naturally gentle flavor that makes regular iced coffee (you know, the kind that’s just hot coffee poured over ice) taste almost harsh by comparison. And if your stomach usually protests after a cup? Cold brew cuts acidity by nearly 70%, so it’s kind to your gut, too.
Here’s the thing—cold brew isn’t some newfangled trend. It’s been around for ages. Japan and Latin America were brewing it long before it became a café staple. These days? It’s everywhere. Drink it straight, lighten it with milk, or go wild with syrups and spices. And since it keeps in the fridge for up to two weeks, it’s the perfect lazy-prep drink.
Watch out, though: cold brew can be sneaky. It often packs more caffeine than hot coffee (depending on how you make it), but the smoothness might fool you into sipping way more than you’d planned.
The beauty of it? You don’t need anything fancy. Grab some coarse coffee, filtered water, a jar, and a strainer—then wait. That’s it. A little time, and suddenly you’ve got something that tastes like it came from a specialty shop. Coming up, we’ll walk you through how to nail it at home.
Benefits of Making Cold Brew at Home
Let’s be honest—store-bought cold brew gets the job done, but making it yourself? It’s cheaper, tastes better, and there’s something oddly satisfying about the process. Once you try it, you won’t look back. Here’s why:
- Your Wallet Will Thank You – Daily cold brew runs add up fast. At home, it’s just coffee, water, and a little patience. No hidden costs, no ridiculous markups.
- It’s Your Coffee, Your Rules – Want it so strong it could wake the dead? Or something smooth and easygoing? You decide—the steep time, the beans, the ratio—all of it’s in your hands.
- Gentler on Your Gut – Cold brew’s secret? Less acid. No more stomach aches, just clean, smooth flavor.
- Meal-Prep for Coffee Lovers – Make a batch on Sunday, toss it in the fridge, and you’re set. Mornings become effortless—no waiting in line, no accidental spills.
- No Sketchy Additives – Who even knows what’s in those bottled versions? At home, it’s just coffee and water. Pure, simple, and exactly how you want it.
- Less Trash, More Good Vibes – Skip the disposable bottles and cups. Your kitchen stays cleaner, and the planet breathes a little easier.
If you love great coffee without the hassle or crazy prices, homemade cold brew’s about to become your new favorite thing. Seriously—give it a shot.
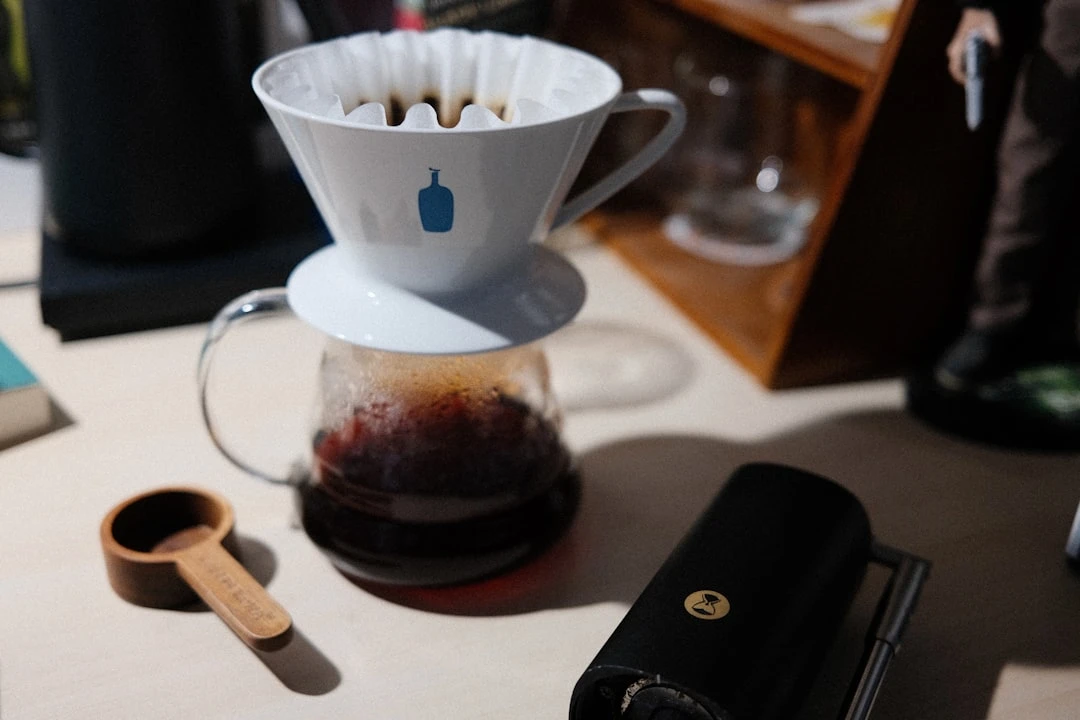
Essential Equipment and Ingredients
Good news—making great cold brew doesn't require a barista's toolkit. Just gather a few essentials, and you're set:
The Must-Haves:
- Coarse Coffee Grounds – Go for fresh beans and a chunky grind. Too fine, and you'll end up with sludge (definitely not the kind you want).
- Filtered Water – Tap works for your houseplants, but your coffee? It deserves better.
- A Container – Mason jar, old pitcher—anything clean and leak-proof. Glass is ideal; no weird plastic aftertaste.
- A Stirring Stick – Chopstick, spoon, butter knife… whatever's handy.
- A Strainer – Cheesecloth, fine mesh sieve, or even your French press (because why complicate things?).
Bonus Upgrades:
- Kitchen Scale – For the perfectionists who crave that precise coffee-to-water ratio.
- Burr Grinder – If you're grinding at home, this keeps things consistent. Blade grinders? Not so much.
- Glass Bottle – Because you'll want to save some for later (it lasts forever, practically).
Pro Move: Experiment with ratios—1:4 for a strong concentrate (perfect for iced lattes) or 1:8 if you like it ready to sip. Your coffee, your call.
There you go. Smooth, low-acid coffee without any fuss. Simple, right?
Step-by-Step Guide to Making Cold Brew
Easy Cold Brew Coffee at Home
Craving silky, deep-flavored coffee without the fuss? Cold brew’s got your back—just coffee, water, and a little patience. Here’s how I make mine (and yeah, it’s pretty much foolproof).
1. Gather Your Gear
You’ll want:
- 1 cup of coarse ground coffee (fine grinds turn into sludge)
- 4 cups cold water (filtered if your tap tastes off)
- A jar or pitcher big enough to hold it all
- Something to strain with—cheesecloth, a fine mesh sieve, or yeah, even a clean sock in a desperate moment
2. Mix It Up
Dump the grounds in, pour water over them, and give it a gentle stir. Don’t overthink it—just make sure everything’s soaked.
3. Now… Wait
Let it sit on the counter for 12 to 24 hours. I shoot for around 18—bold but not harsh. Sneak a whiff now and then if you can’t help yourself.
4. Strain It Out
Pour it slowly into another container. If you’re picky about grit, run it through a paper filter after the first strain. Trust me, it helps.
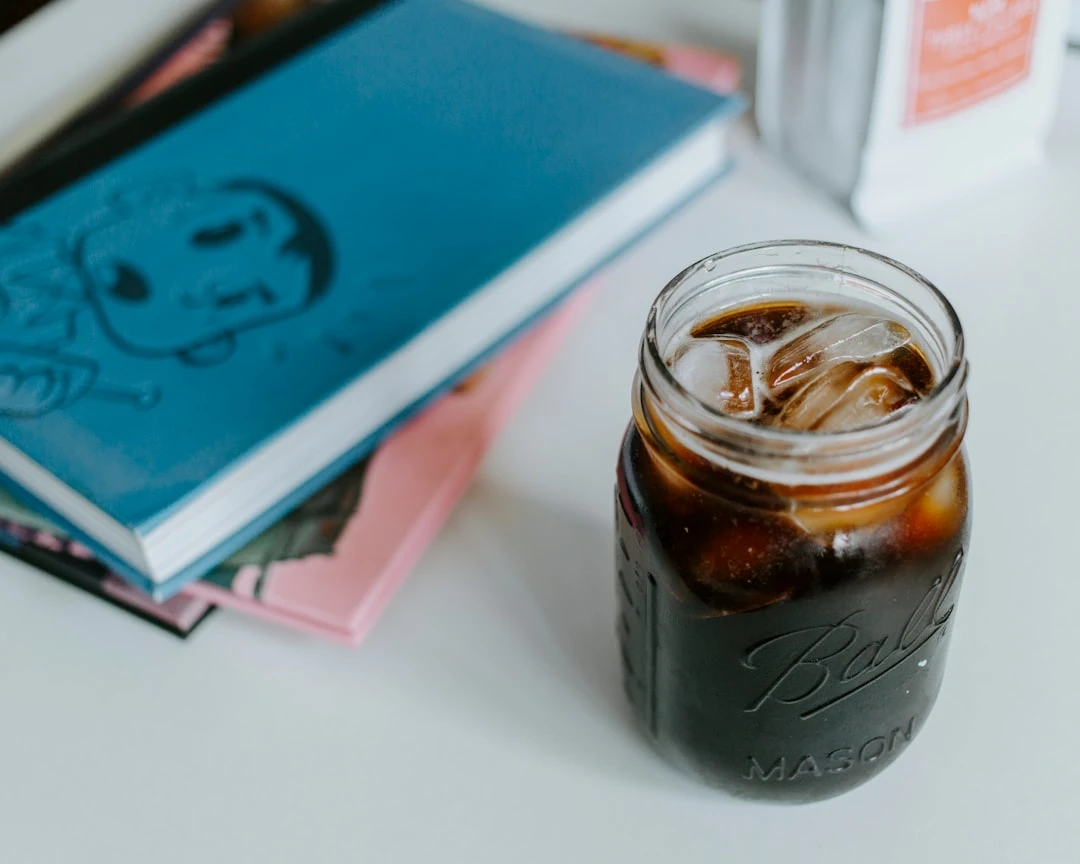
5. Drink Up
This stuff’s strong! Cut it with water or milk, or pour it straight over ice. Keeps in the fridge for up to 2 weeks (good luck making it last that long).
Lessons Learned the Hard Way:
- Better beans make better brew. It’s worth it.
- Steeping time isn’t sacred—adjust until it tastes right to you.
- Keep it airtight, or it’ll go flat fast.
And there you go. Cheap, simple cold brew that puts fancy coffee shops to shame. Enjoy.
Tips for Perfecting Your Cold Brew
There's a quiet kind of magic in a well-made cold brew—no elaborate gear required, just good coffee and a bit of waiting. Here’s how to get it right, every single time.
- Start with Great Beans – Freshness is everything. Go for a medium or dark roast, ground coarse—it’ll give you that velvety depth without any sharp edges.
- Nail the Ratio – Try 1 part coffee to 4 parts water for a strong concentrate. Too much? Just dilute it later with water or milk. Simple.
- Wait It Out – Let it sit for 12 to 24 hours at room temp. Less time (12–16 hours) keeps it lively; more (18–24) makes it deep and intense. Up to you.
- Strain Like a Pro – A fine mesh sieve, cheesecloth, or even a paper filter will catch those stray grounds. Grit’s the last thing you want.
- Keep It Tight – Store it in the fridge, sealed up tight. It’ll stay good for two weeks—if you can resist drinking it all first.
- Get Creative – Toss in a cinnamon stick, vanilla pod, or orange peel while it brews. Or stir in syrup after. Make it yours.
- Serve It Right – Ice-cold, always. Drink it straight, add cream, or sweeten to taste. However you like it best.
Adjust the grind, timing, or filters until it feels just right. Then sit back and savor. Cheers.
How to Store and Serve Cold Brew
Storing and serving cold brew the right way makes all the difference—here's how to keep every sip smooth and full of flavor.
Storing It Right
Once it's brewed, pour that deep, rich concentrate into an airtight container—glass or stainless steel works best to keep the taste pure. Slide it into the fridge, where it'll stay good for up to two weeks, though 7–10 days is when it's at its best. Already mixed it with water or milk? Try to finish it within 3–5 days—those extras make it spoil faster.
Want to make it last even longer? Freeze the concentrate in ice cube trays, then pop the cubes into a freezer bag. They'll hold up for 3 months—just thaw them in the fridge before you use them.
Serving It Up
Cold brew is all about flexibility. Here’s how to make the most of it:
- Dilute it with water, milk, or whatever milk alternative you like—start with half-and-half and tweak it to your taste.
- Pour it over ice for that crisp, refreshing kick.
- Mix it into cocktails, smoothies, or even brownie batter if you want a little caffeine boost.
Like it strong? Drink it straight (just know—it hits hard). Prefer it warm? Heat it gently—but don’t let it boil, or you’ll lose that smooth, velvety finish.
Little Tricks
- Label your container with the date—no need to play guessing games later.
- Give it a light shake if it starts to look a little separated.
- For an even smoother sip, strain it through a coffee filter or fine sieve to catch any lingering grit.
Stick to these tips, and your cold brew will always be ready to shine.
Frequently Asked Questions (FAQs)
1. So what’s the deal with cold brew?
Think of coffee that’s been lounging in cold water for hours—maybe even a full day. No hurry, no heat, just slow extraction. What you get is something smoother, mellower, with none of that sharpness hot-brewed iced coffee sometimes has.
2. Which beans should I grab?
Go for medium or dark roasts—they hold up best. A coarse grind is key (imagine rough sand). Fresh beans? Ideal. That half-empty bag in your cupboard? It’ll do in a pinch.
3. What’s the coffee-to-water sweet spot?
Try 1 part coffee to 4 parts water if you like a strong concentrate (cut it later). Or 1:8 if you’d rather drink it straight. But honestly? Play around. Coffee’s personal.
4. How long do I let it sit there?
Anywhere from 12 hours (bare minimum) to 24 (deep and rich). Less time means lighter flavors; more time means bolder. Depends on your mood.
5. Do I need a $200 gadget?
Nope. A jar and a strainer work fine. That French press collecting dust? Perfect for this.
6. How do I keep it fresh?
Toss it in the fridge in something airtight—good for up to two weeks. If it’s concentrate, remember to dilute. Unless you’re into that jittery, over-caffeinated vibe.
7. Why’s it so gentle on my stomach?
Cold water doesn’t pull out as much acid or bitterness. So it’s kinder to your gut, and honestly, just tastes… calmer.
8. Can I cheat the clock?
Sure—shake it, use room-temp water, cut the time. But it won’t taste as deep. Patience pays off here.
Experiment. Tweak. Maybe even fail once or twice. That’s how you figure out what you love.